Posted on: 4 March, 2020 - 11:00
Skype for Business is typically installed with Office 365 or with the Microsoft Suite, if not please navigate to the below links and install it. If you require assistance, Please write to [email protected] (or) contact your local IT Support specialist for guidance.
Install Skype for Business Basic (Windows)
Install Skype for Business Basic (Mac)
Once installed, launch Skype for Business by clicking on the icon shown below.
![]()
Sign in to Skype for Business
Step 1: Enter your AUS E-mail address (****@aus.edu) and click 'Sign In'.
Step 2: You will then be asked to enter your password, once done click 'Sign In'
Step 3: Once signed in successfully you can now use Skype for Business

Chat in Skype for Business
Find and add a contact
Step 1: On the Contacts tab, in the Find someone box, type a name or email address.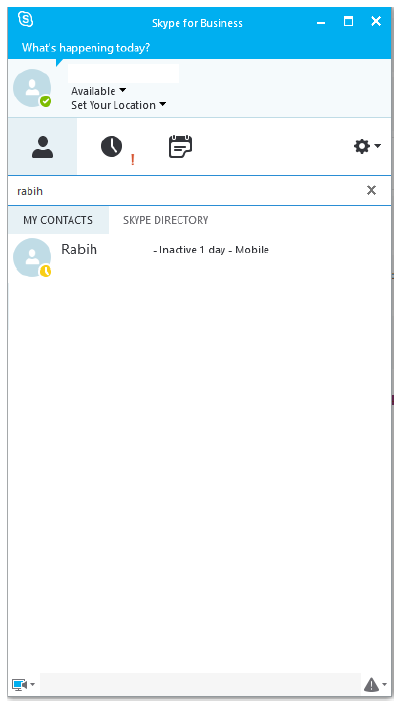
Step 2: In the search results, right-click the person you want to add, and select Add to Contacts List.
Step 3: Select the contact group you want to add the person to, if you have contact groups set up.
Step 4: You can right click and add the contact to “Favorites” if need be.
Start an Instant Message (IM)
Step 1: On the Contacts tab, point to a contact's picture, and then select Send an IM, alternatively you can also double click on it to start a chat session.

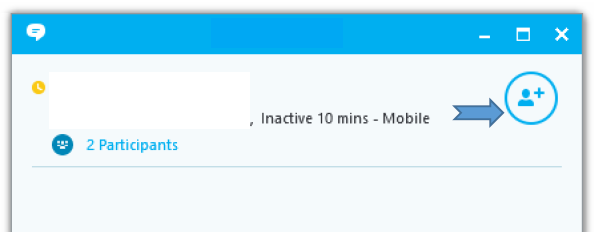
Step 2: To add others, select Invite More People in the upper-right corner.
Step 3: Type your message.
Step 4: Select Send or press Enter.
Start a voice or video call
Step 1: Point to a contact's picture and select Call or Start a video call.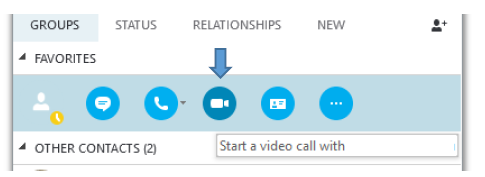
Step 2: To add voice or video to an existing conversation, select Call or Video Call

Share your desktop or a program
Step 1: Select Share Content and select an option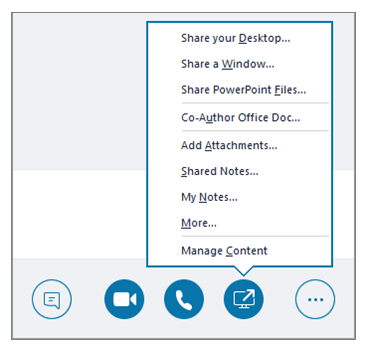
Step 2: Select Stop Sharing when you are done.
Set up your Audio/Video device.
Step 1: From Show Menu > Tools > Options > Audio Device you can adjust the Audio Device Settings
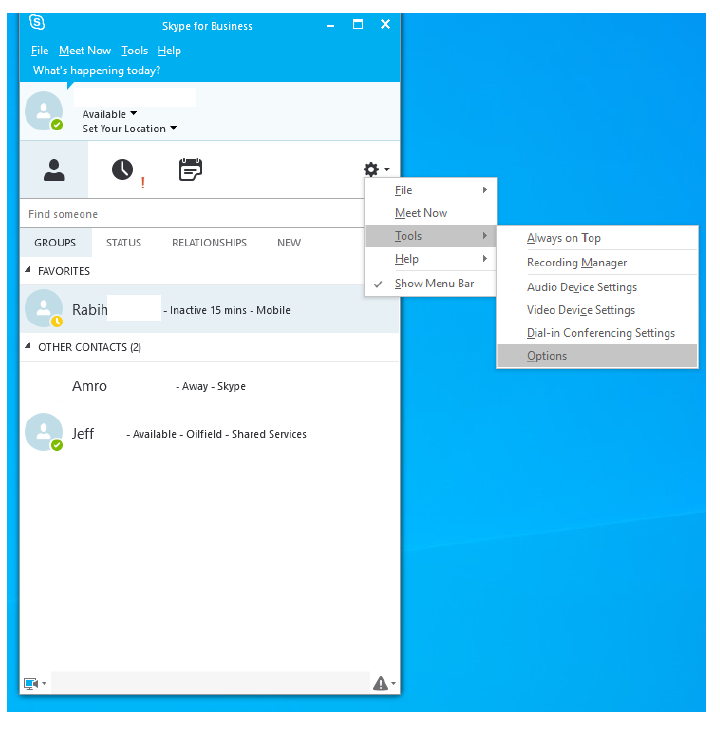

Step 2: From Show Menu > Tools > Options > Video Device you can adjust the Video Device Settings

