Posted on: 23 March, 2020 - 16:01
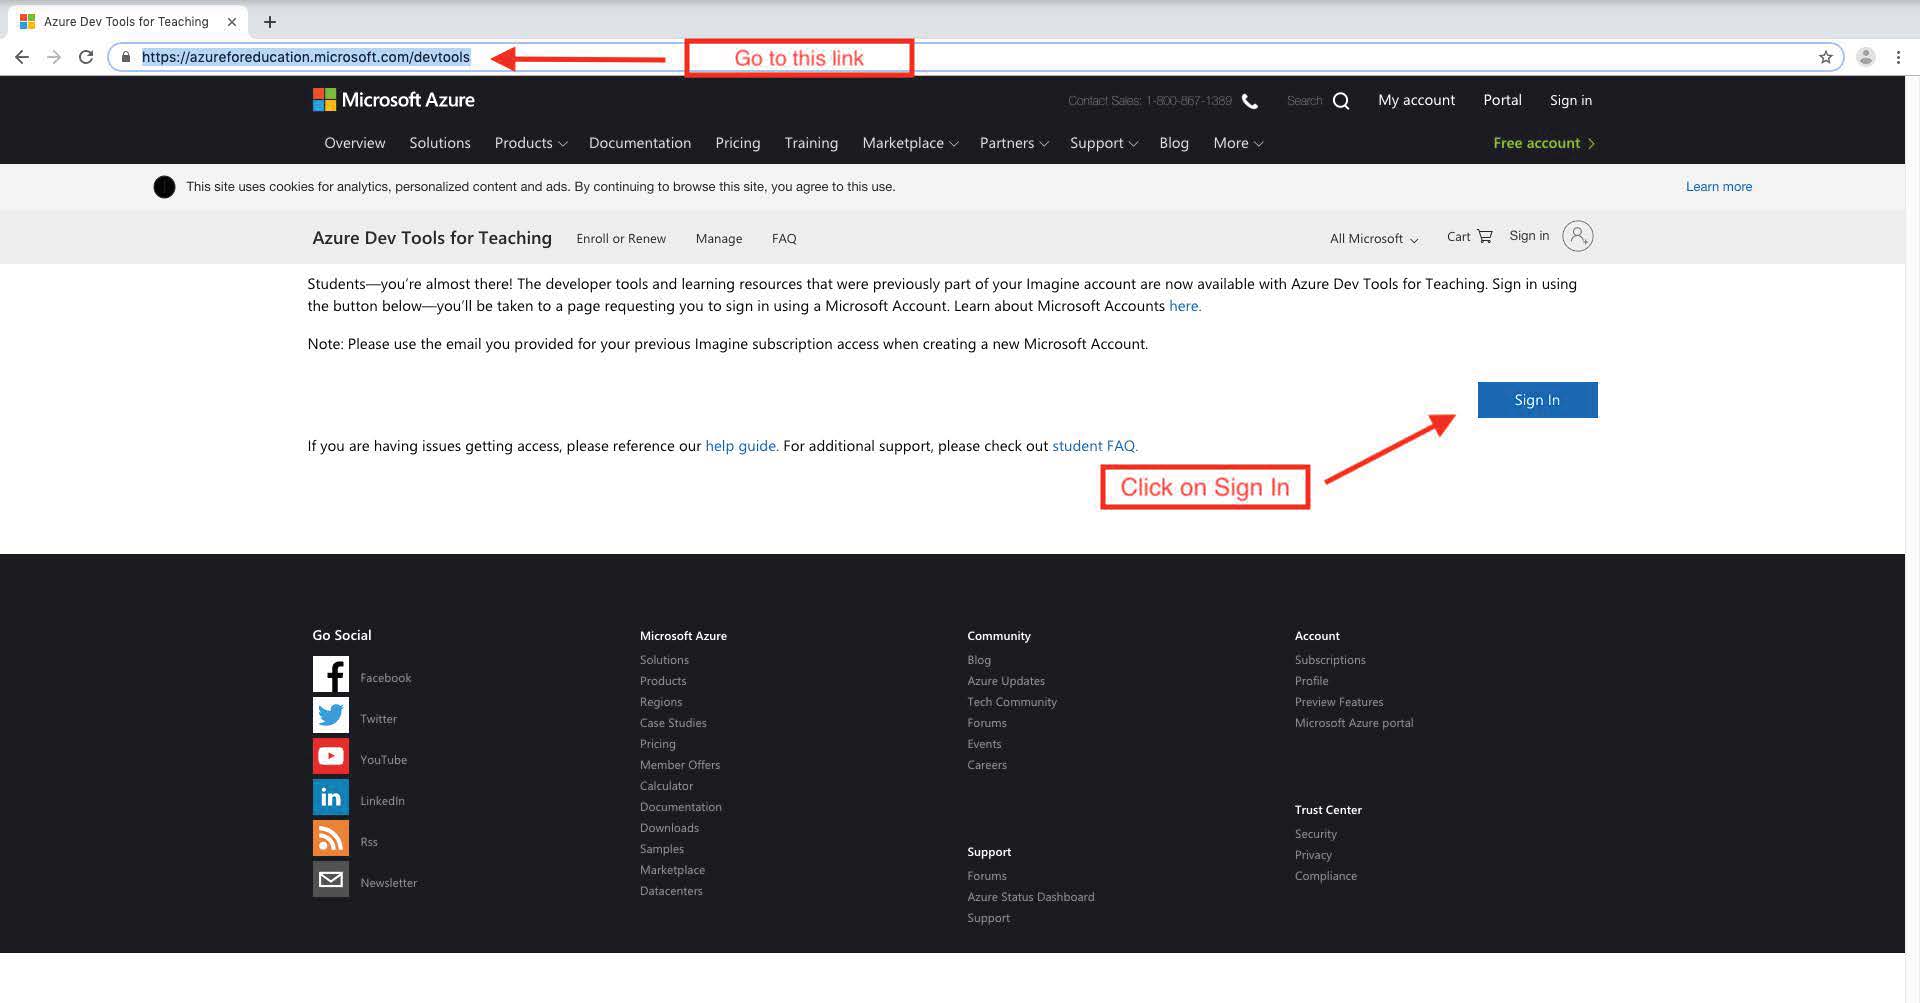
Step 1: Go to Microsoft Azure through https://azureforeducation.microsoft.com/devtools
Step 2: Click on Sign in
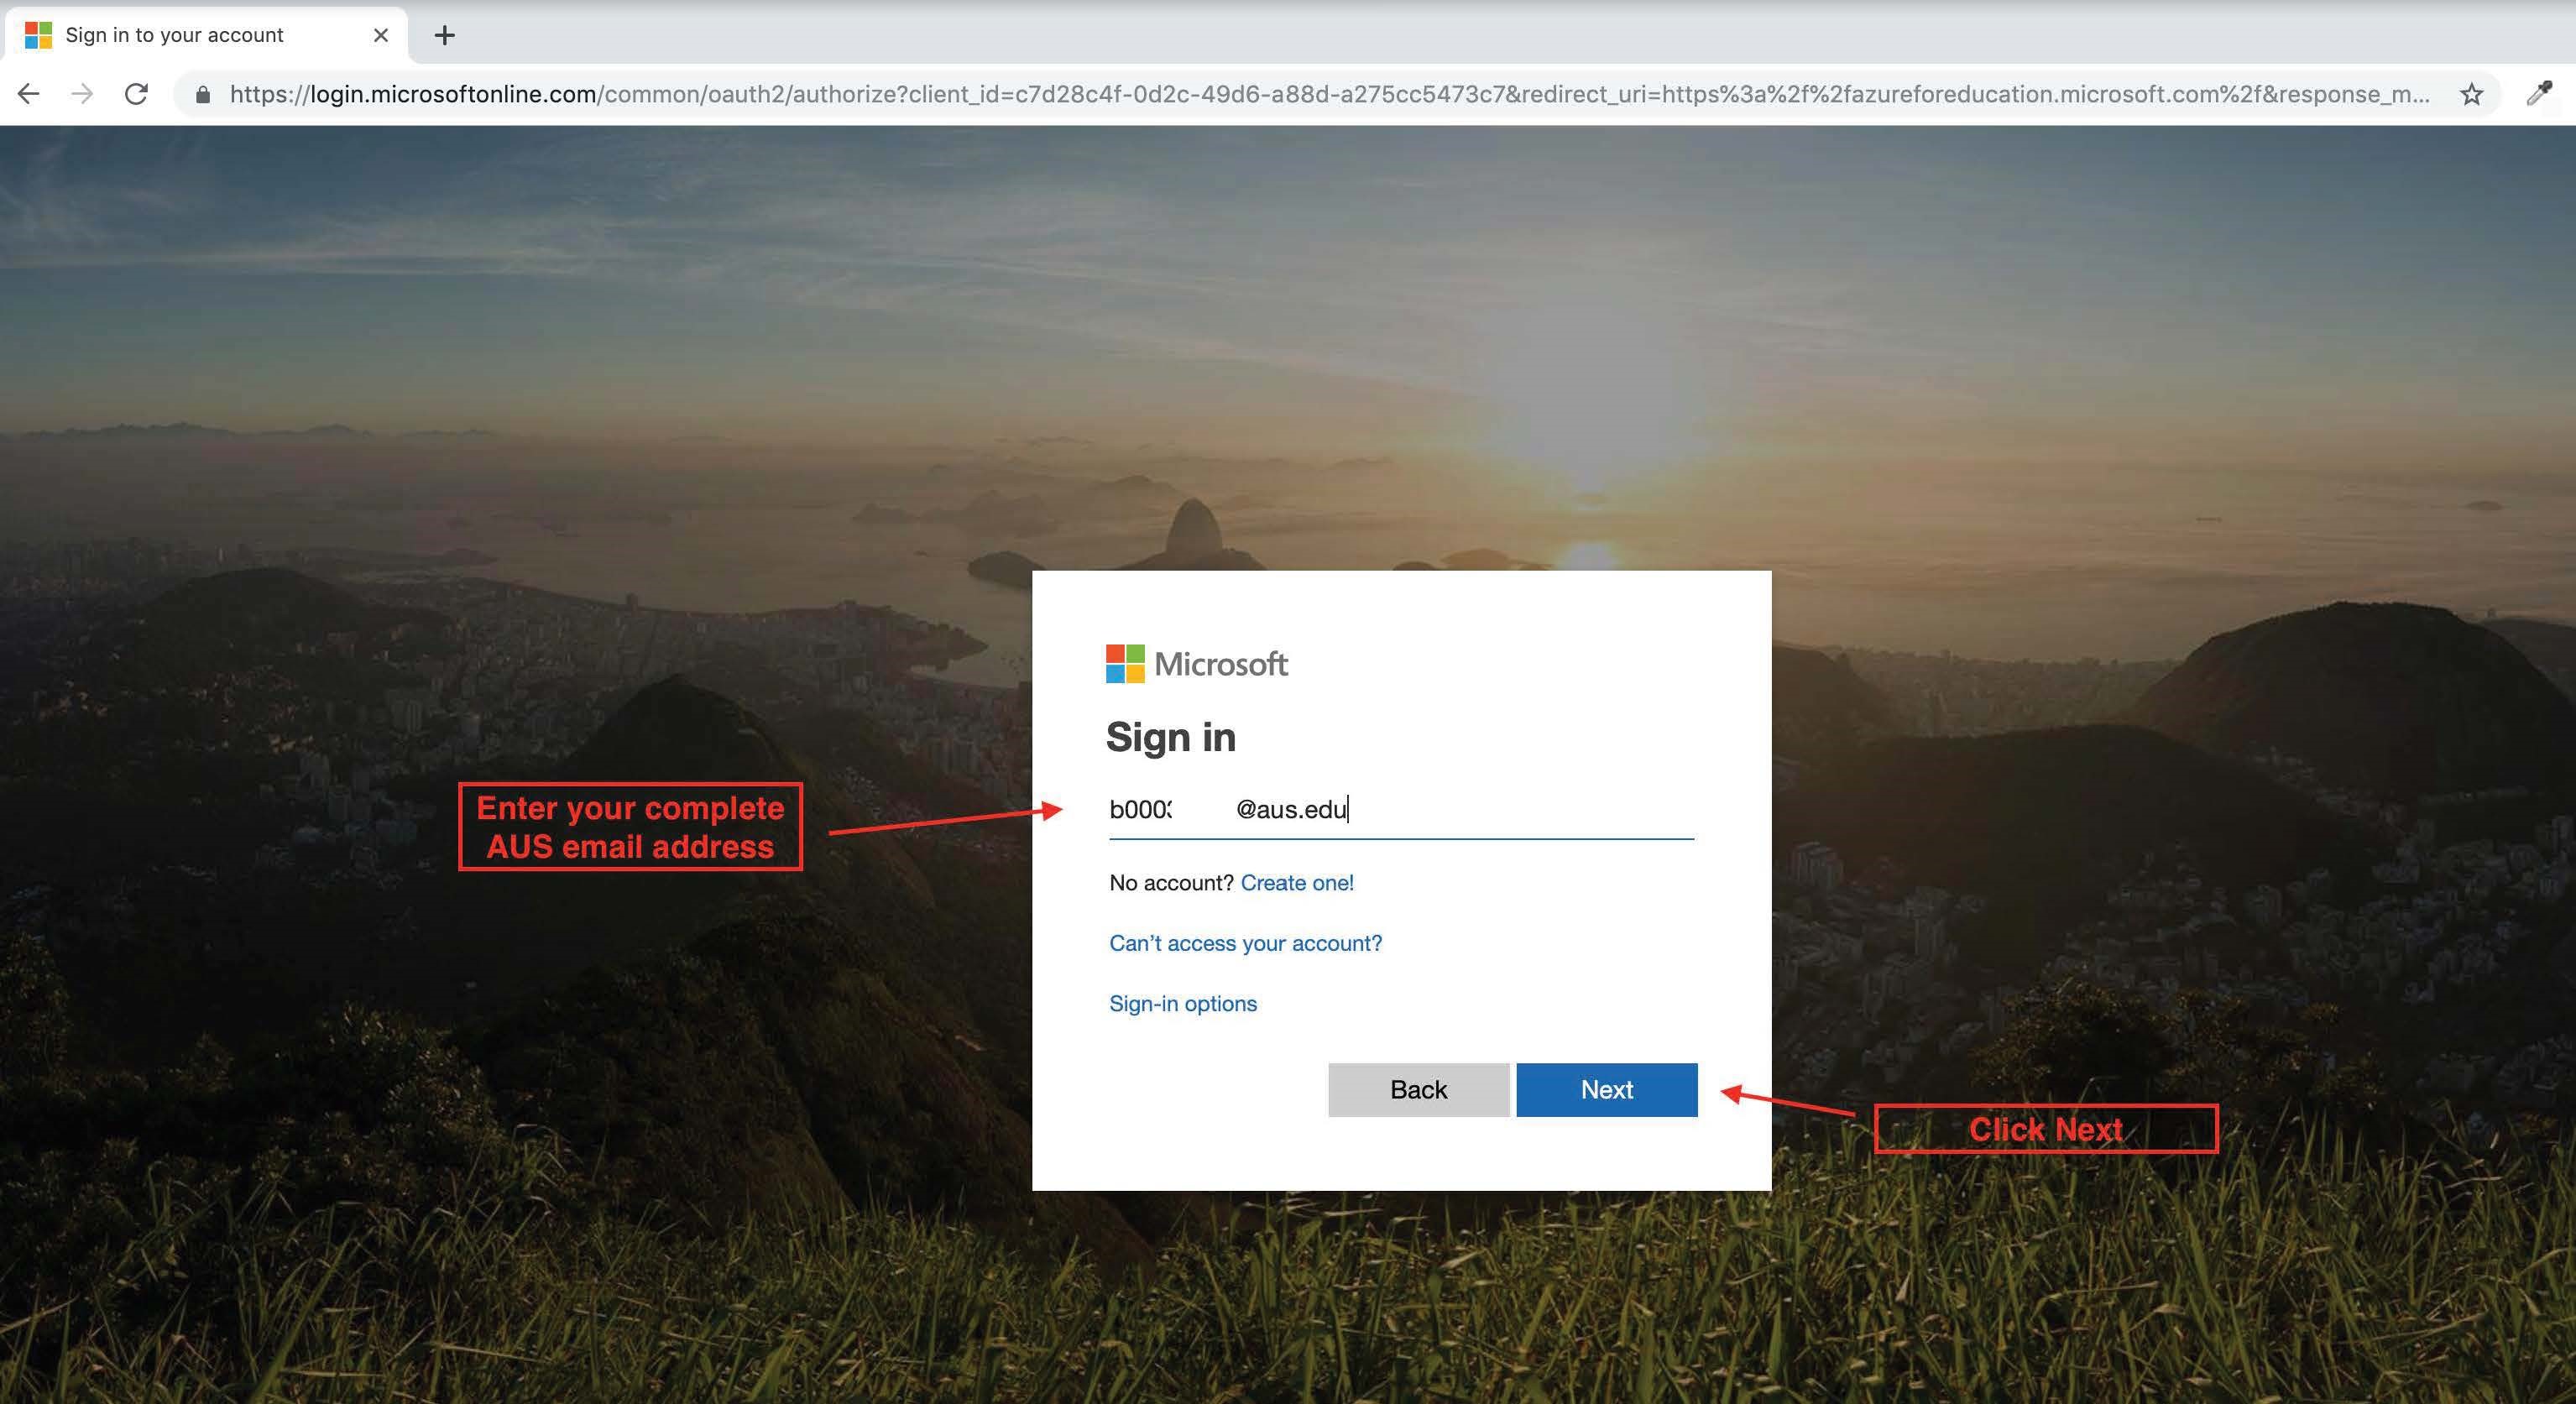
Step 3: Enter your username as [email protected]/[email protected]
Step 4: Then click Next
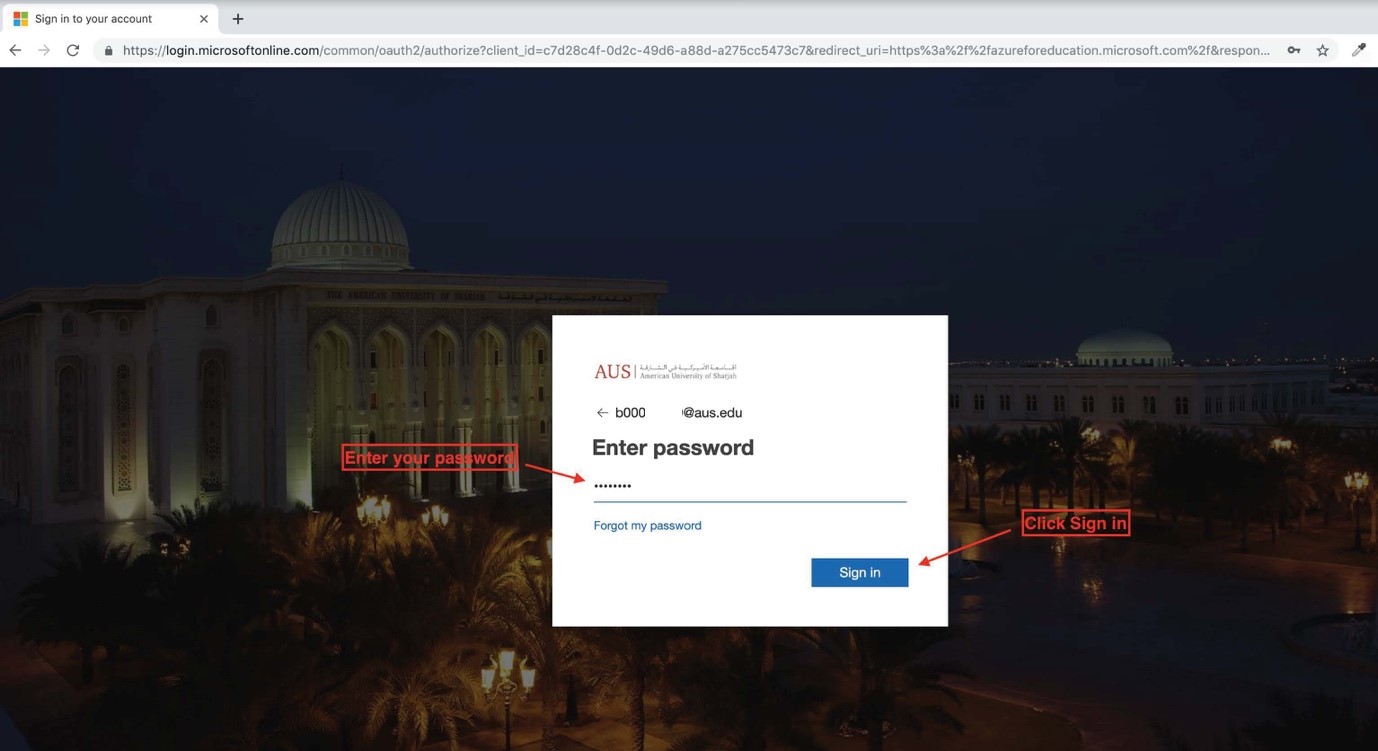
Step 5: Enter the password on next prompt and click Sign in
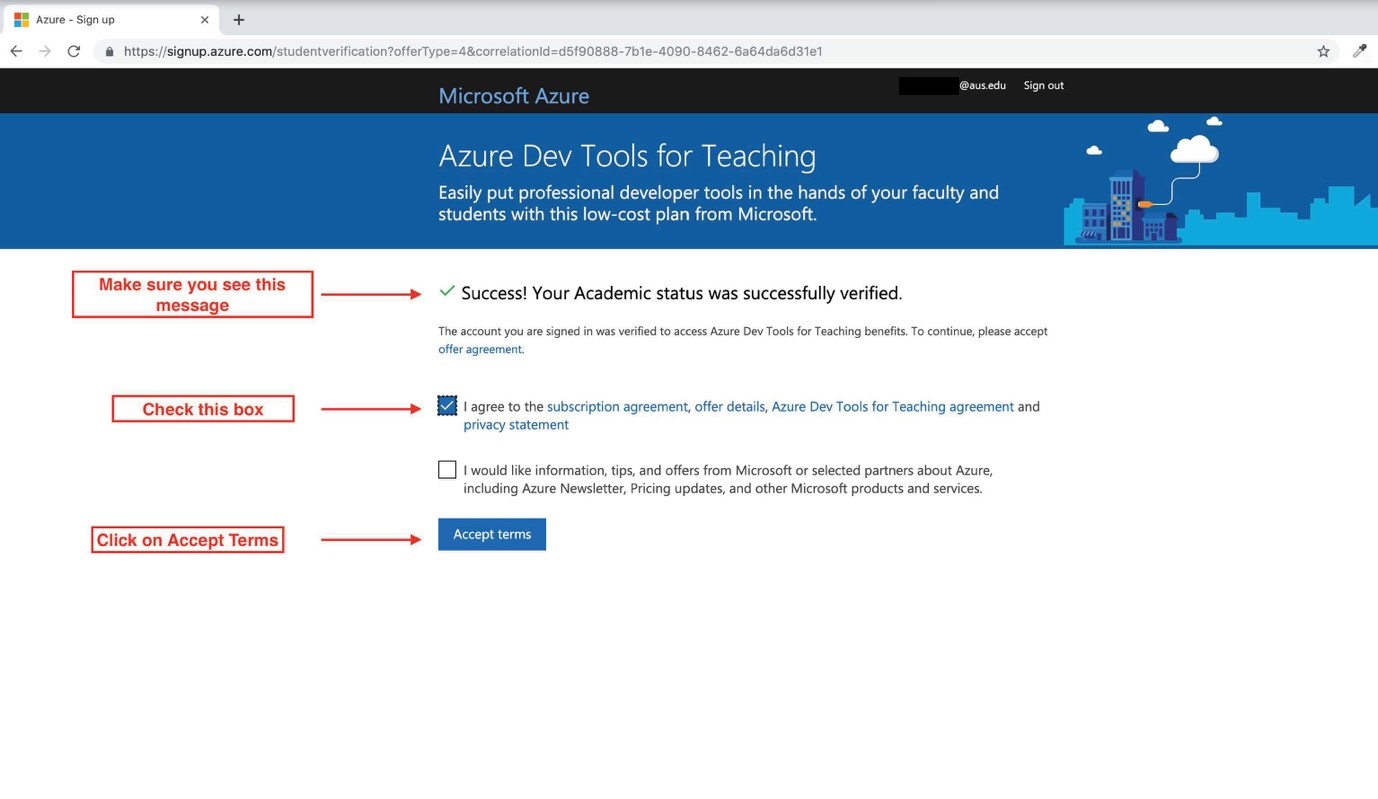
Step 6: Make sure of the following, then Click Accept terms
- Success! Your Academic status was successfully verified
- The check box is selected "I agree to the subscription agreement, offer details, Azure Dev Tools for Teaching agreement and privacy statement"
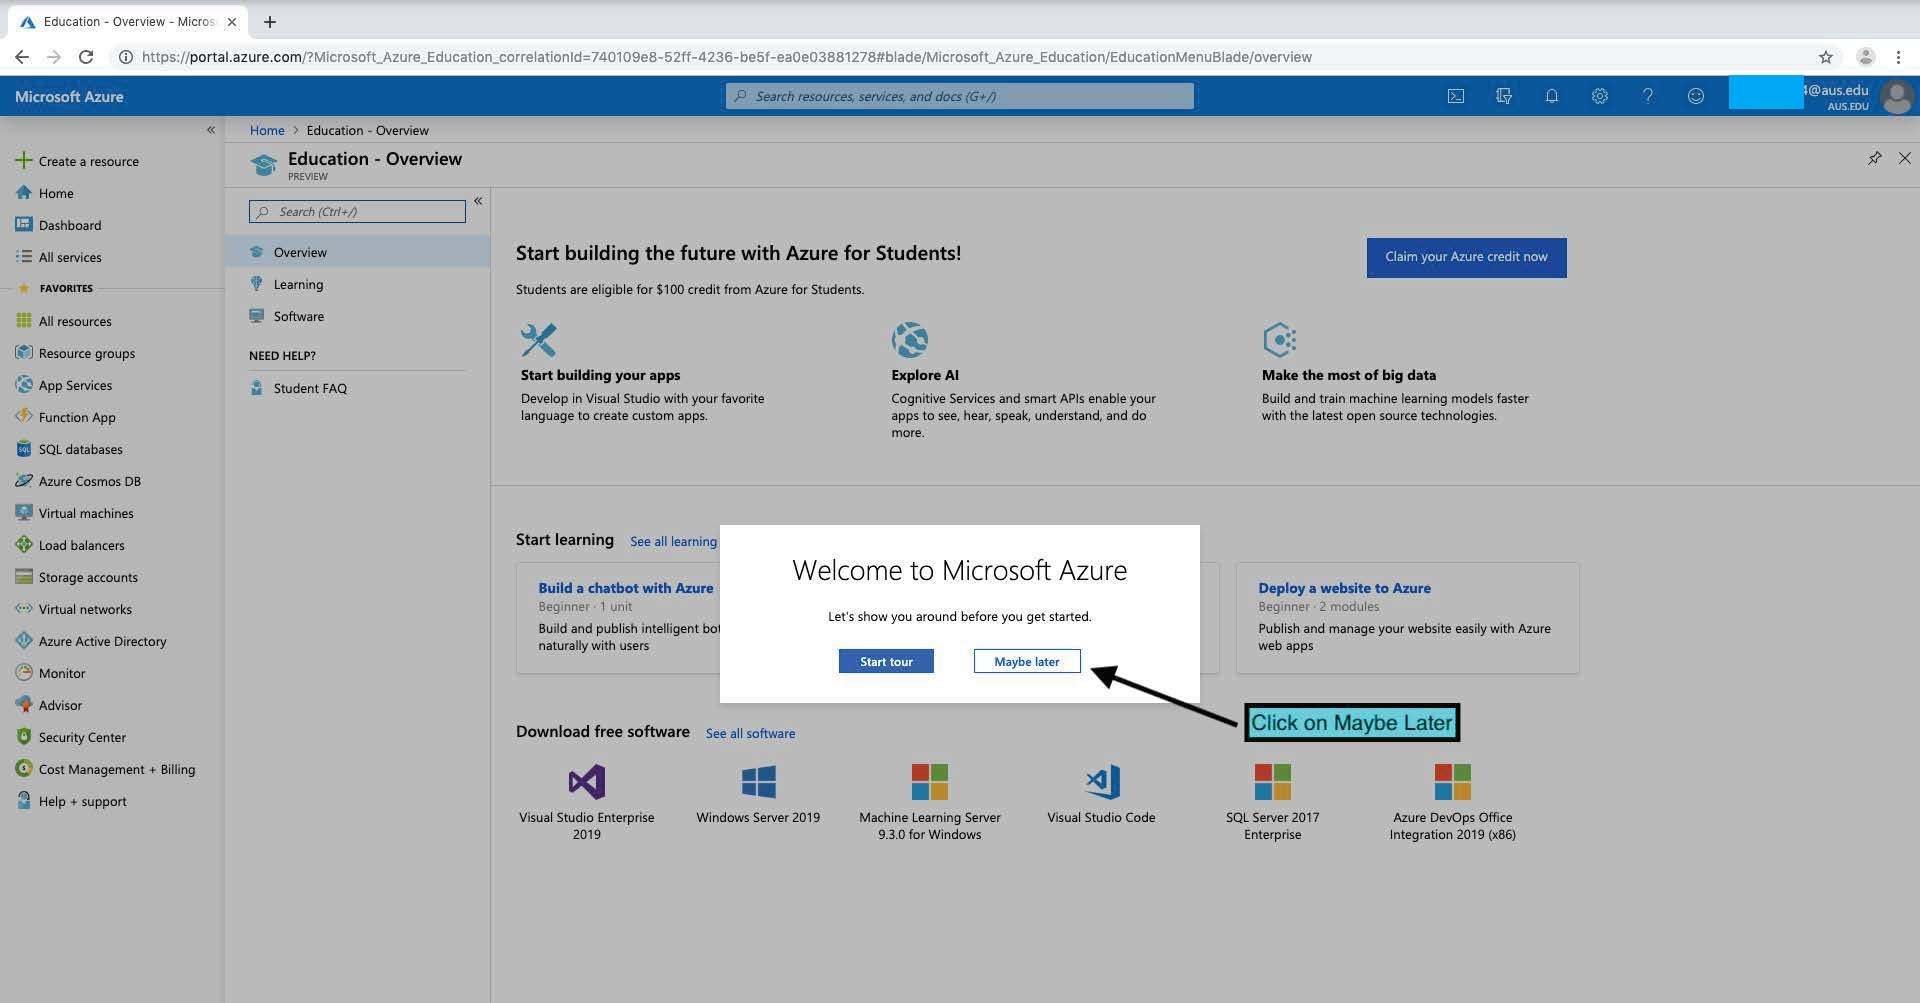
Step 9: You will be promoted for a tour to Microsoft Azure, click Maybe later
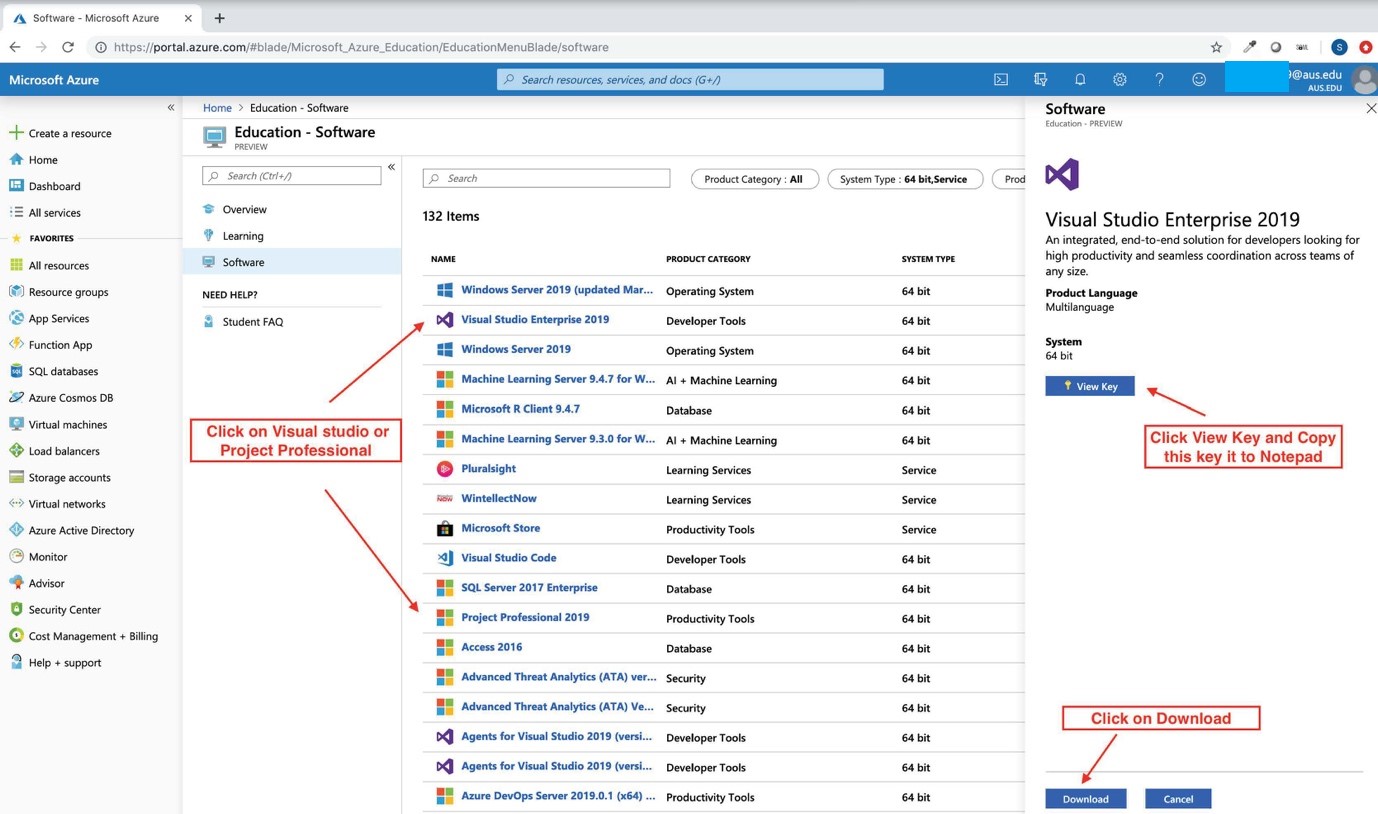
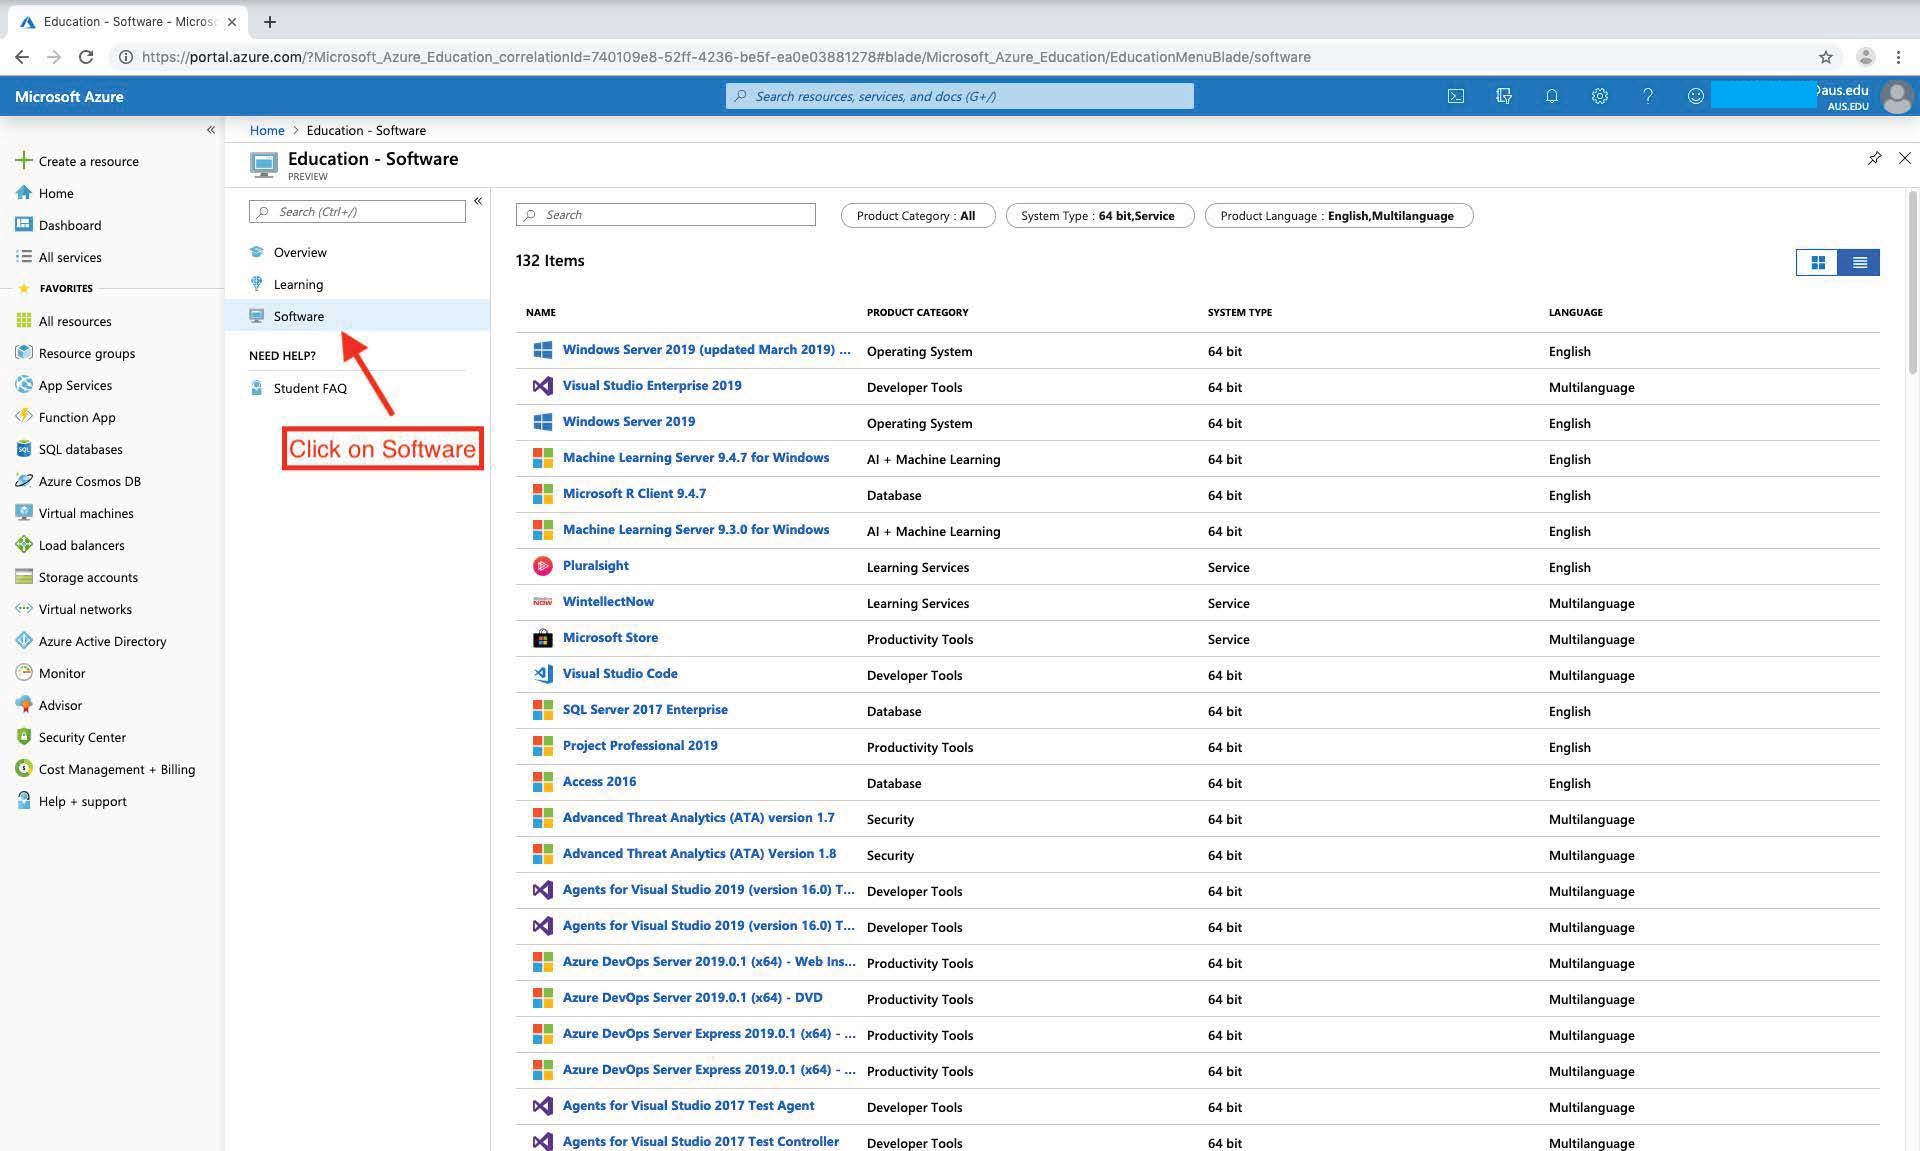
Step 10: Click on the Software menu. Some of the applications that can be installed from Azure are the following:
- Visual Studio Enterprise
- Project Professional
- Visio Professional
- SQL Server 2019 Developer
- Windows 10 Education N, Version 1809
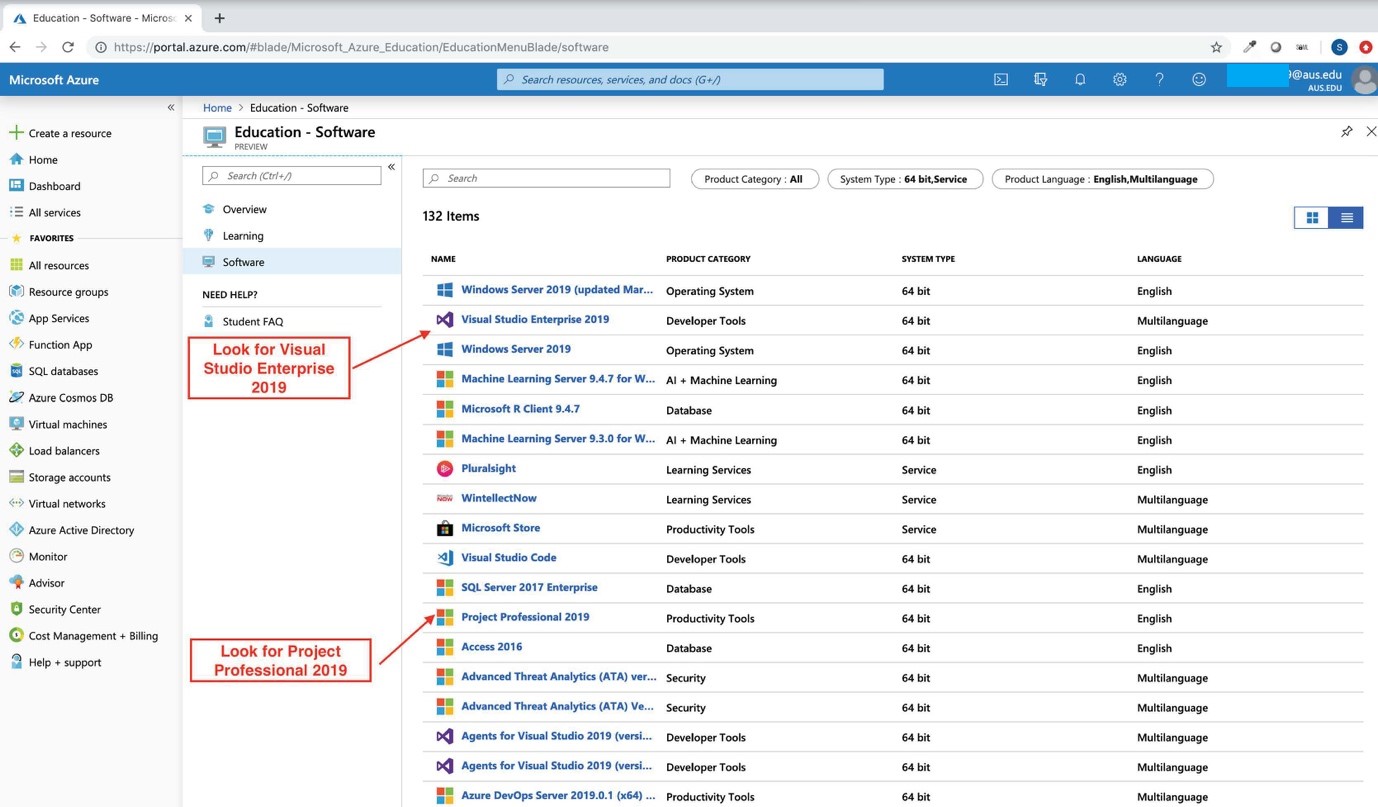
Step 11: Locate the application that you want to install
Step 12: After clicking on the application a panel will appear on the right side with information of the application and the product key if applicable
Note: Make sure to note down the product key/serial number as it is need during/after the installation