
Posted on: 30 August, 2020 - 11:57
Multi-Factor Authentication (MFA) is an extra security step you will have to perform at Login. This guide will walk you through the process and help in understanding MFA.
Quick Links
What is Multi-Factor Authentication (MFA)?
At AUS, we are always working to ensure that your account is as secure as possible. In today's online environment, Login information can be compromised in a matter of minutes by cyber criminals.
To combat this, Multi-factor authentication (MFA), also commonly known as two step verification, is an authentication method where a user is only granted access after successfully presenting two or more pieces of evidence at login. Access is denied if either are incorrect.
To access your account, you would need:
- Your AUS username and password, proving something you know.
- A code or responding to a verification request sent to your device, proving something you have. This verification request can be sent to your device in the form of a call or through an app called Microsoft Authenticator.
If you have ever had to put in an additional code to enter your online banking, this process will not be completely foreign to you.
What do I need to do?
MFA will soon be mandatory for all faculty, staff and students. See the video below and get started today! For your convenience, you can also refer to the detailed instructions provided below the video.
It will only take 10 minutes of your time.
How to Enable Multi-Factor Authentication:
Detailed Steps:
Step 1: Visit MFA enrollment website using: http://aka.ms/mfasetup. Next, enter your AUS credentials to start the enrollment process.
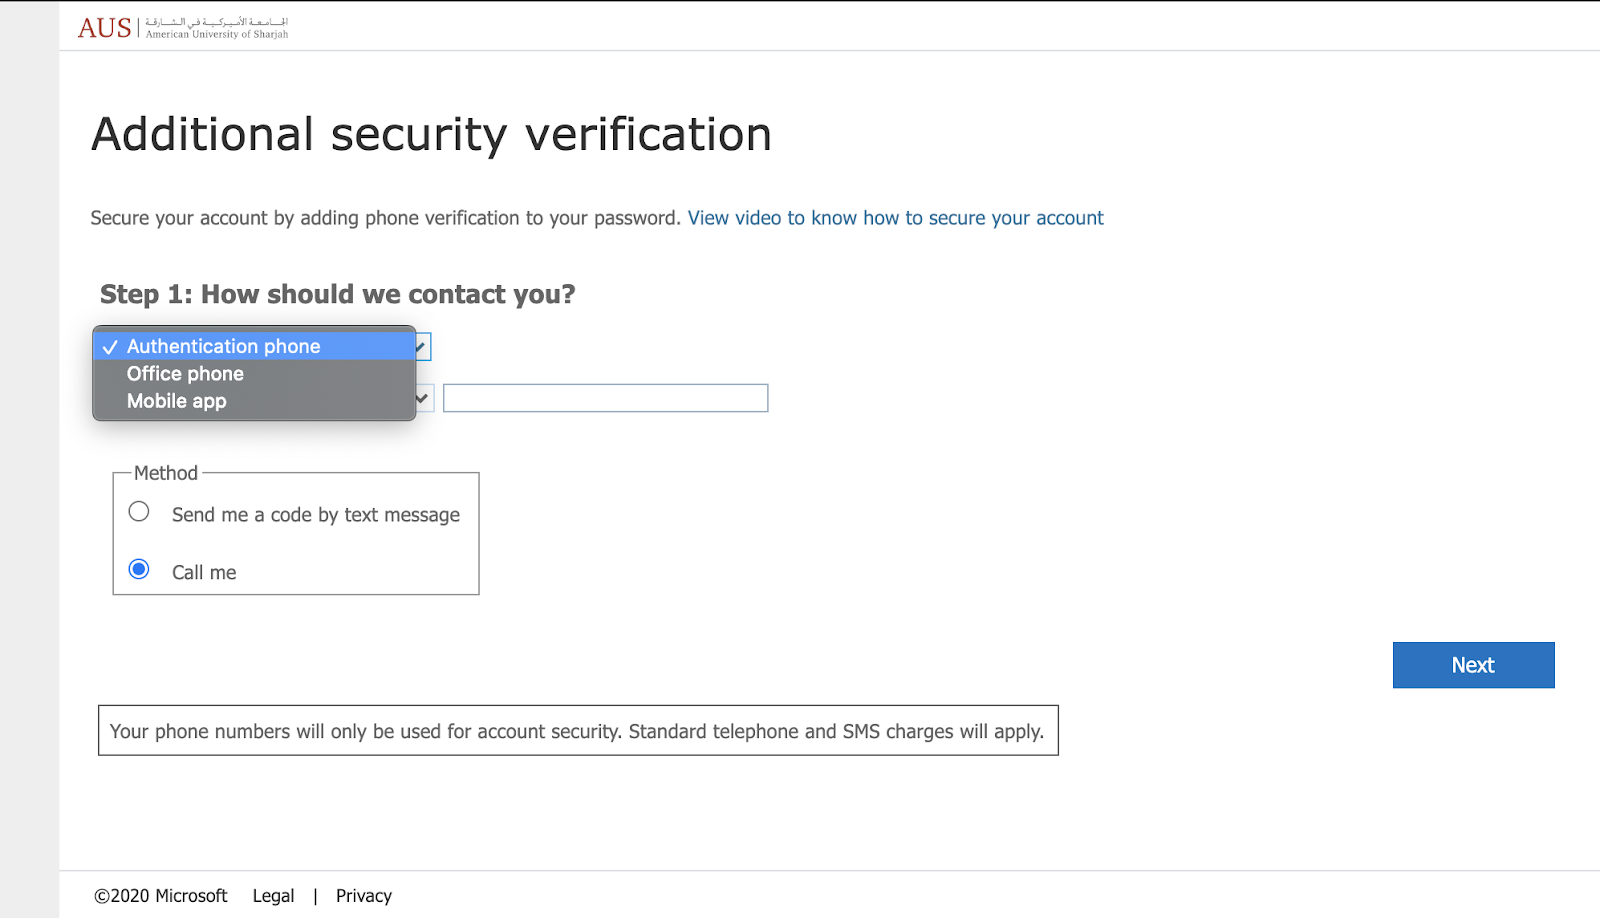
Step 2: You will now be directed to a page where you can choose how you would like to contacted:
- Authentication phone
- Mobile app (recommended)
IMPORTANT: The next steps will vary depending on your preference selected.
Click here to skip to Step 3.1: Authentication Phone
Click here to skip to Step 3.2: Mobile App
Step 3.1: Authentication Phone
1. Select your country or region from the drop-down list and enter your phone number. 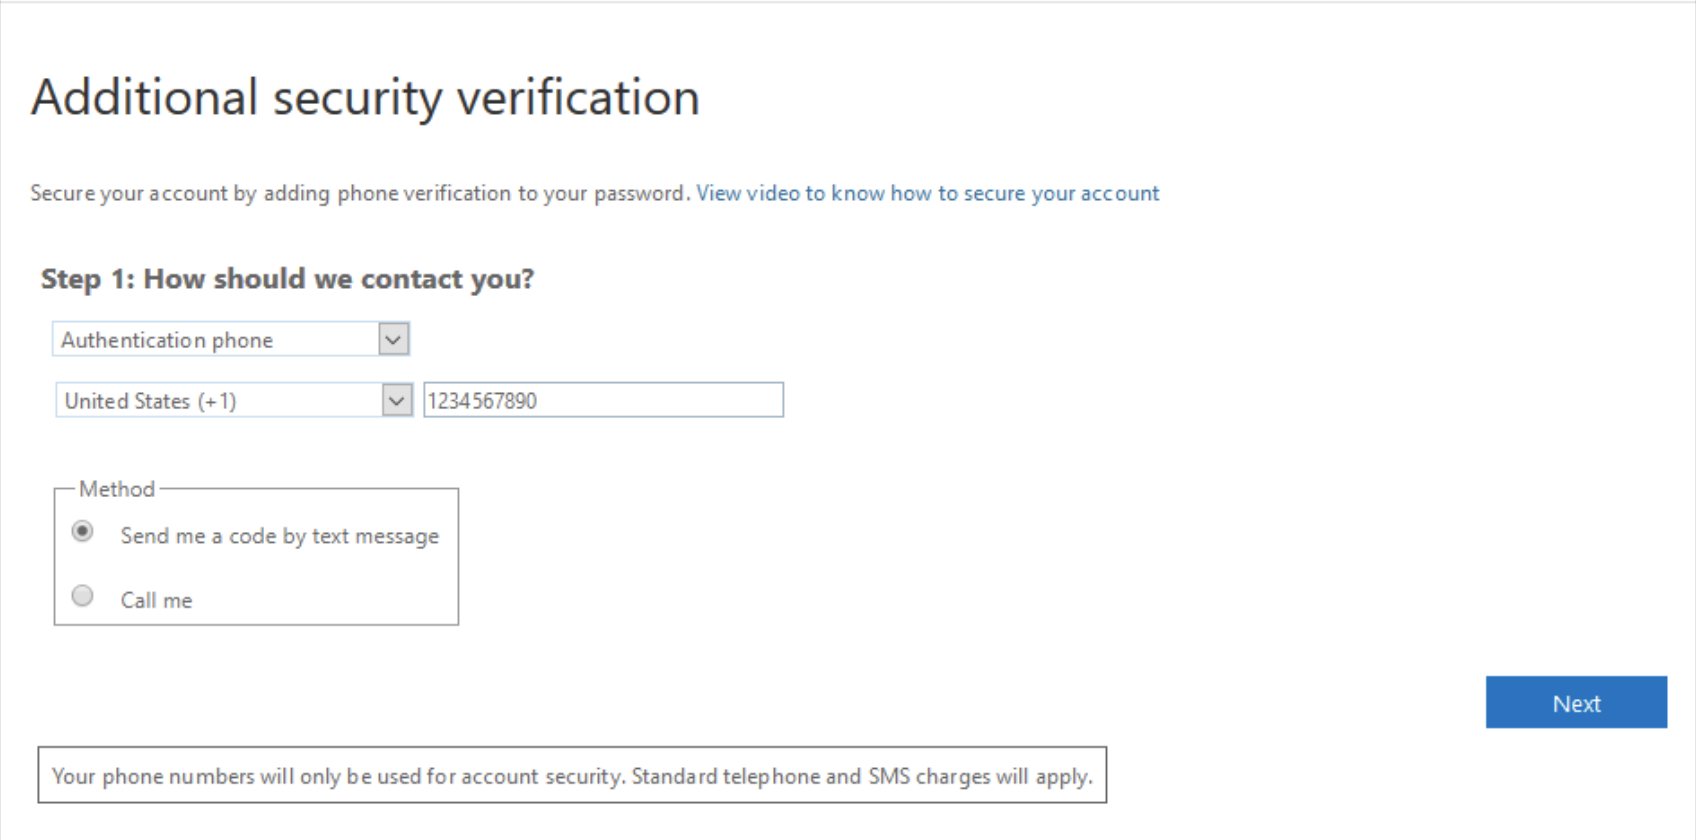
2. Choose whether you want to receive a text or call (AUS discourages the use of texts as cyber criminals can intercept, phish and spoof this). Then, click on Next. 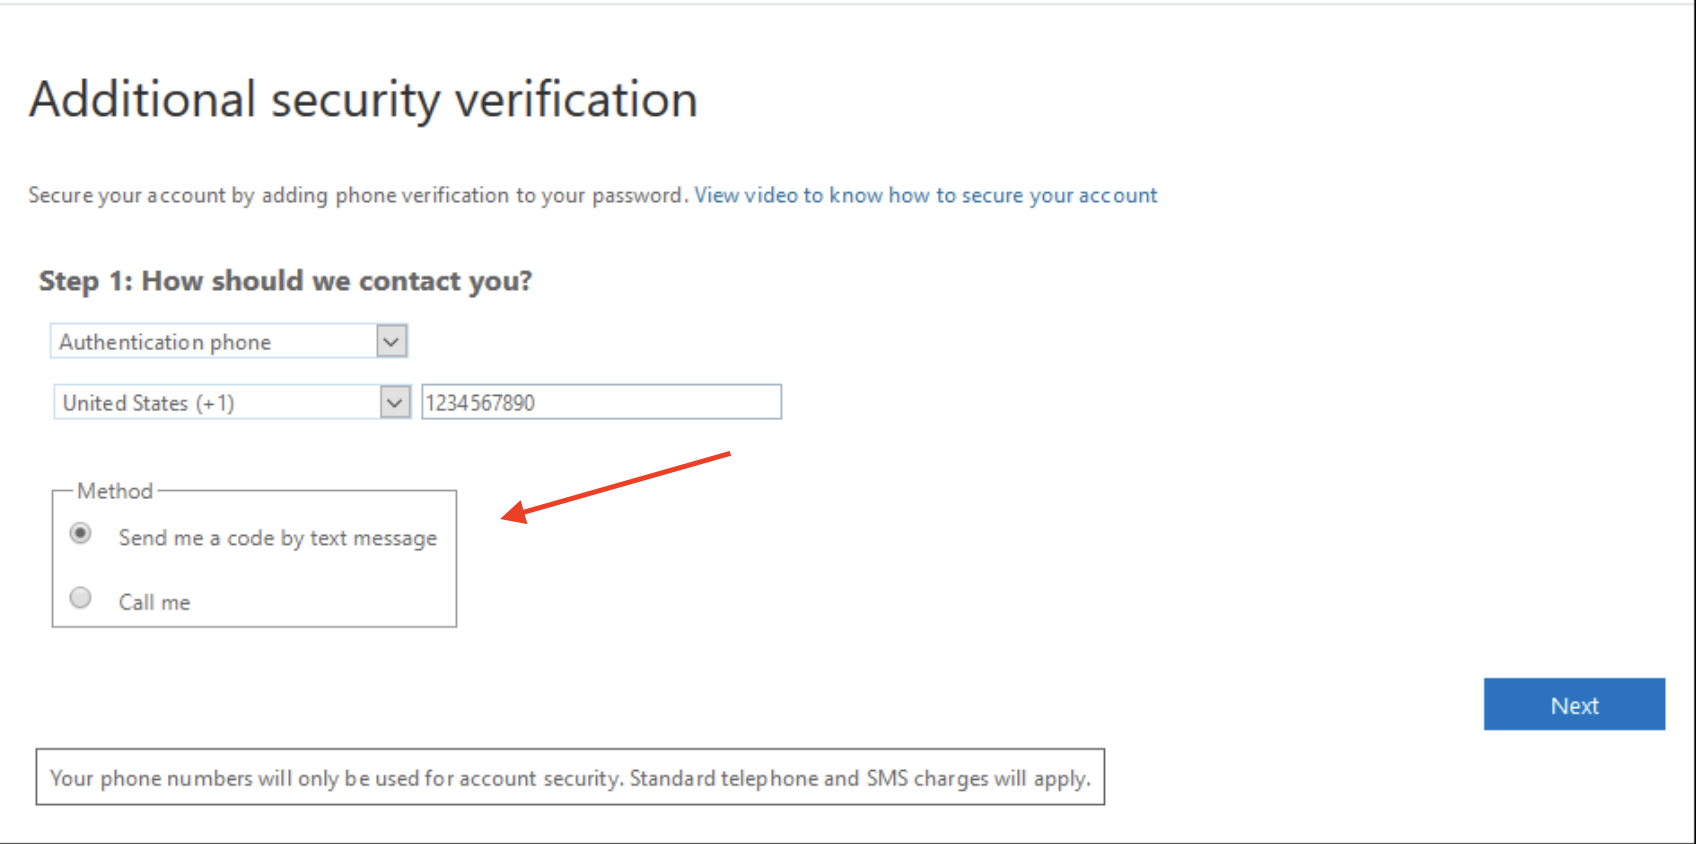
3. Microsoft (MSFT) will contact you by either text or call your phone number to supply a code - if on call you are asked to enter the ‘pound key’ press # on the keypad.
4. Enter the code. If text message your chosen option, click Verify.
5. Click Done on the next page in order to complete your MFA setup.
Step 3.2: Mobile App (recommended)
*Download the Microsoft Authenticator app from either the App Store for iPhones or the Google Play Store for Androids.
Note: If this is the first time you're setting up the Microsoft Authenticator app, you might receive a prompt asking whether to allow the app to access your camera (iOS) or to allow the app to take pictures and record video (Android). You must select Allow so the authenticator app can access your camera to take a picture of the QR code in the next step. If you don't allow the camera, you can still set up the authenticator app, but you'll need to add the code information manually. For information about how to add the code manually, see Manually add an account to the app.
1. Select the option - ‘Notifications for Verification’.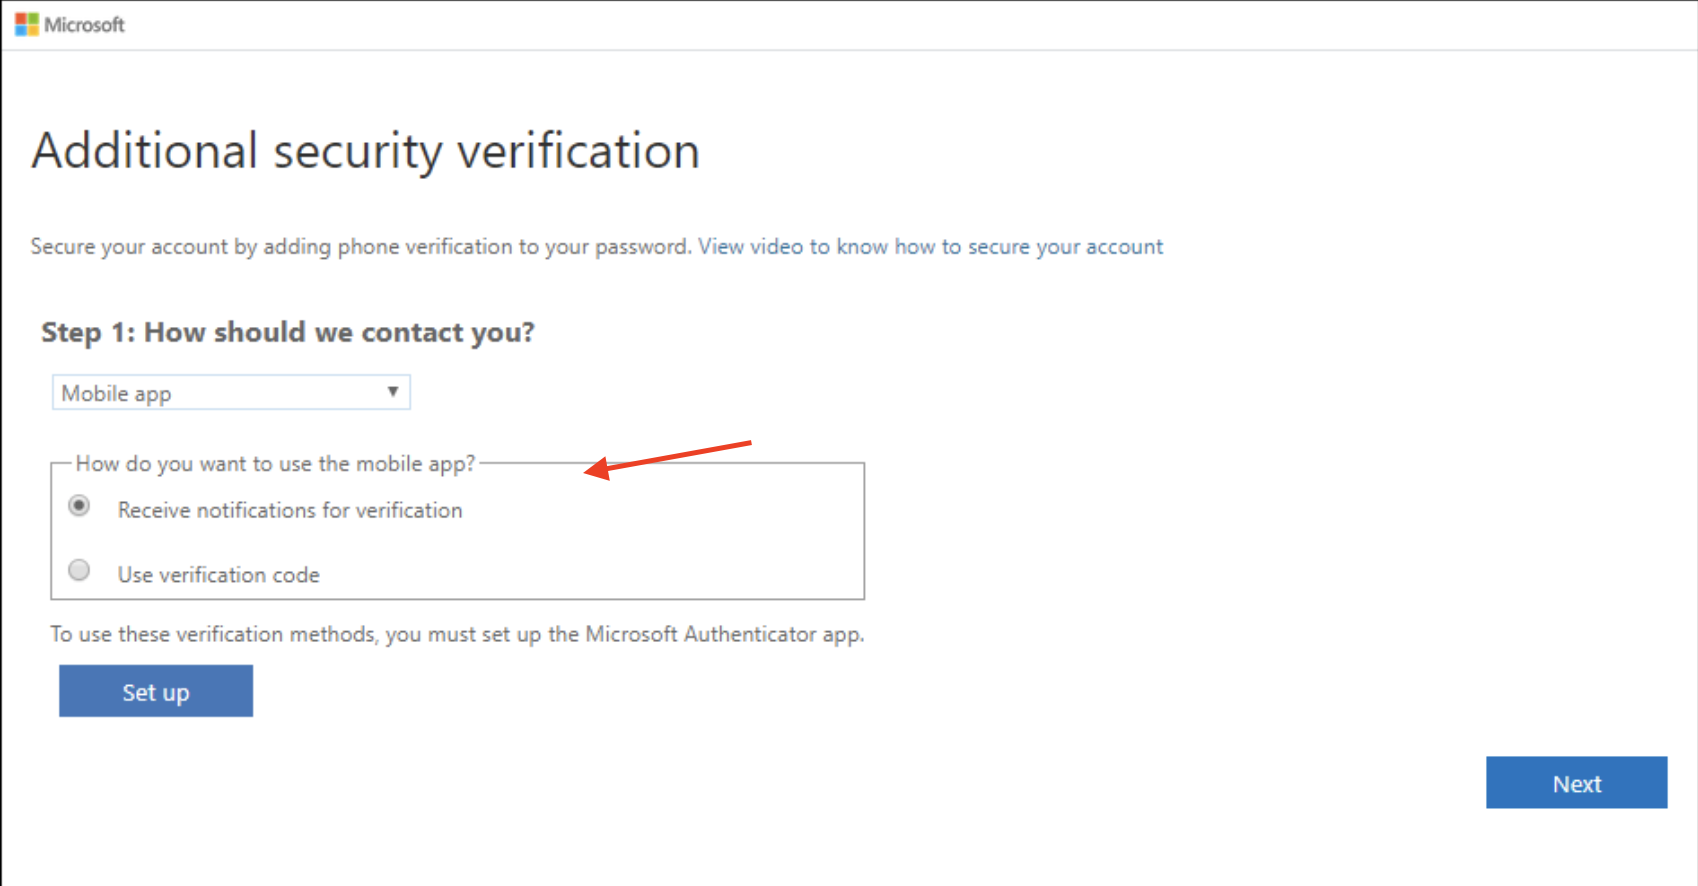
2. You will not be allowed to proceed next until you set up the mobile app. Click on Set up.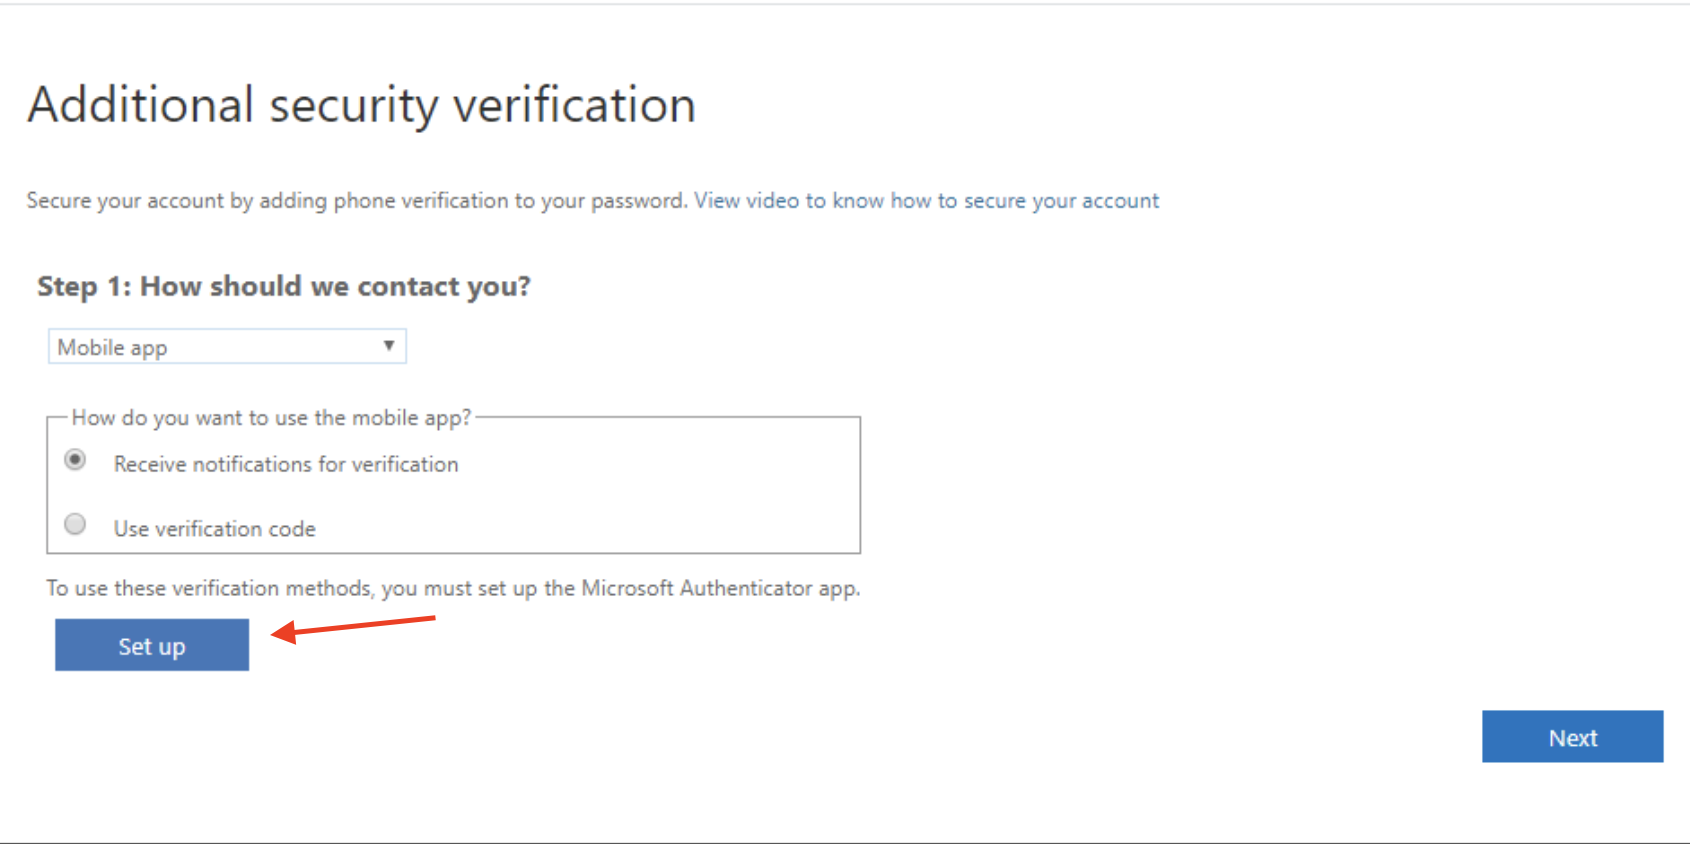
3. A pop up with instructions to configure the app on your phone will be displayed. Go to your phone’s app store and install ‘Microsoft Authenticator app’. Follow the instructions on screen and add a ‘work or school account’. 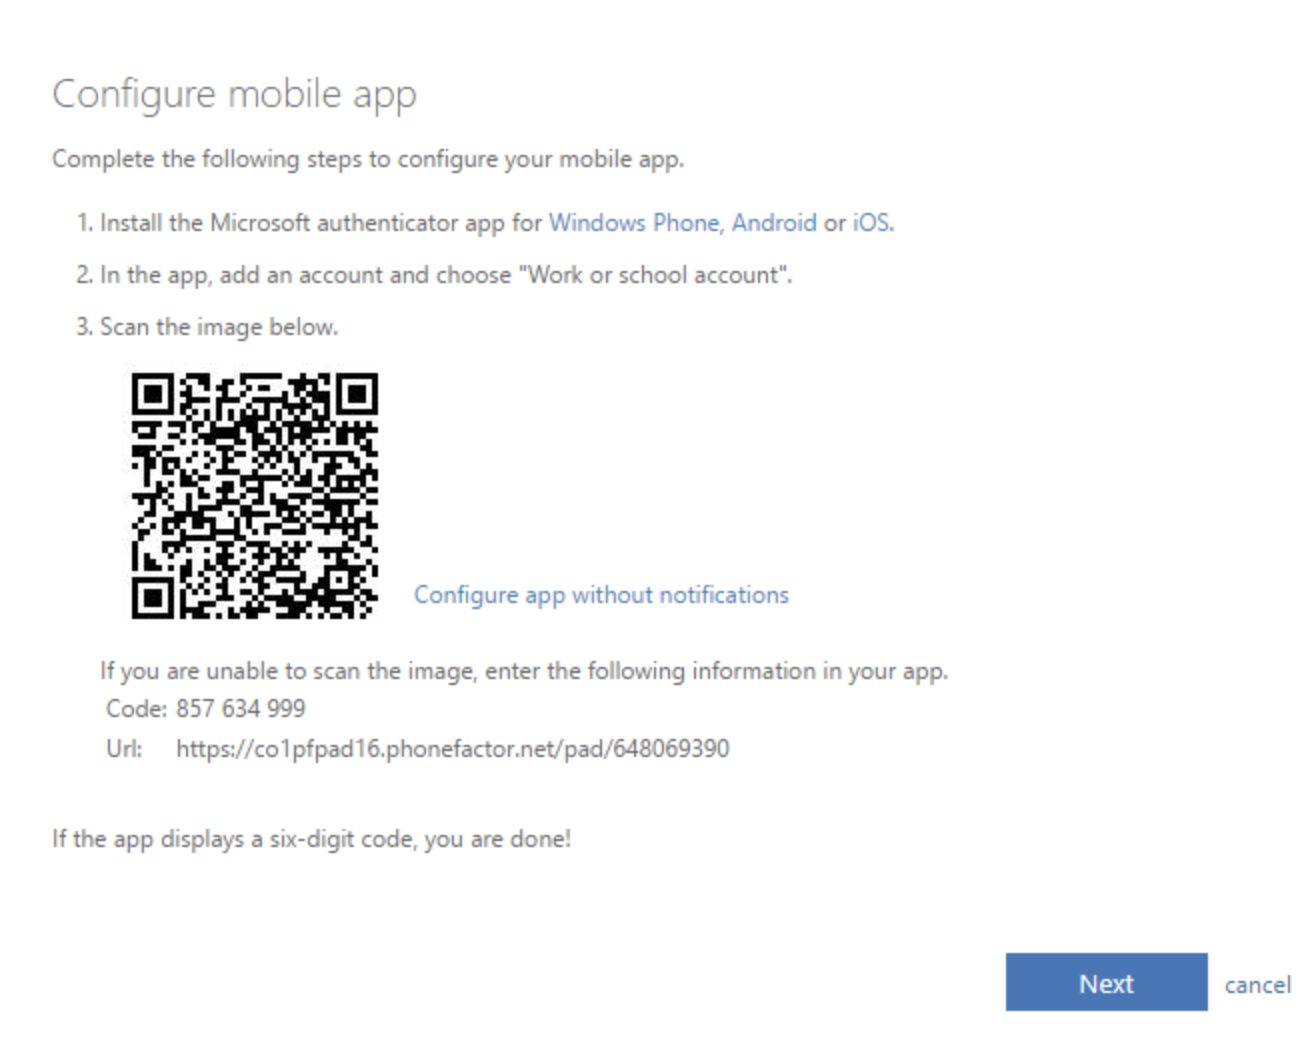
4. Use your device's camera to scan the QR code from the 'Configure mobile app' screen on your computer, and then click Next.
5. Return to your computer and the Additional security verification page, make sure you received the message that says your configuration was successful, and then click Next.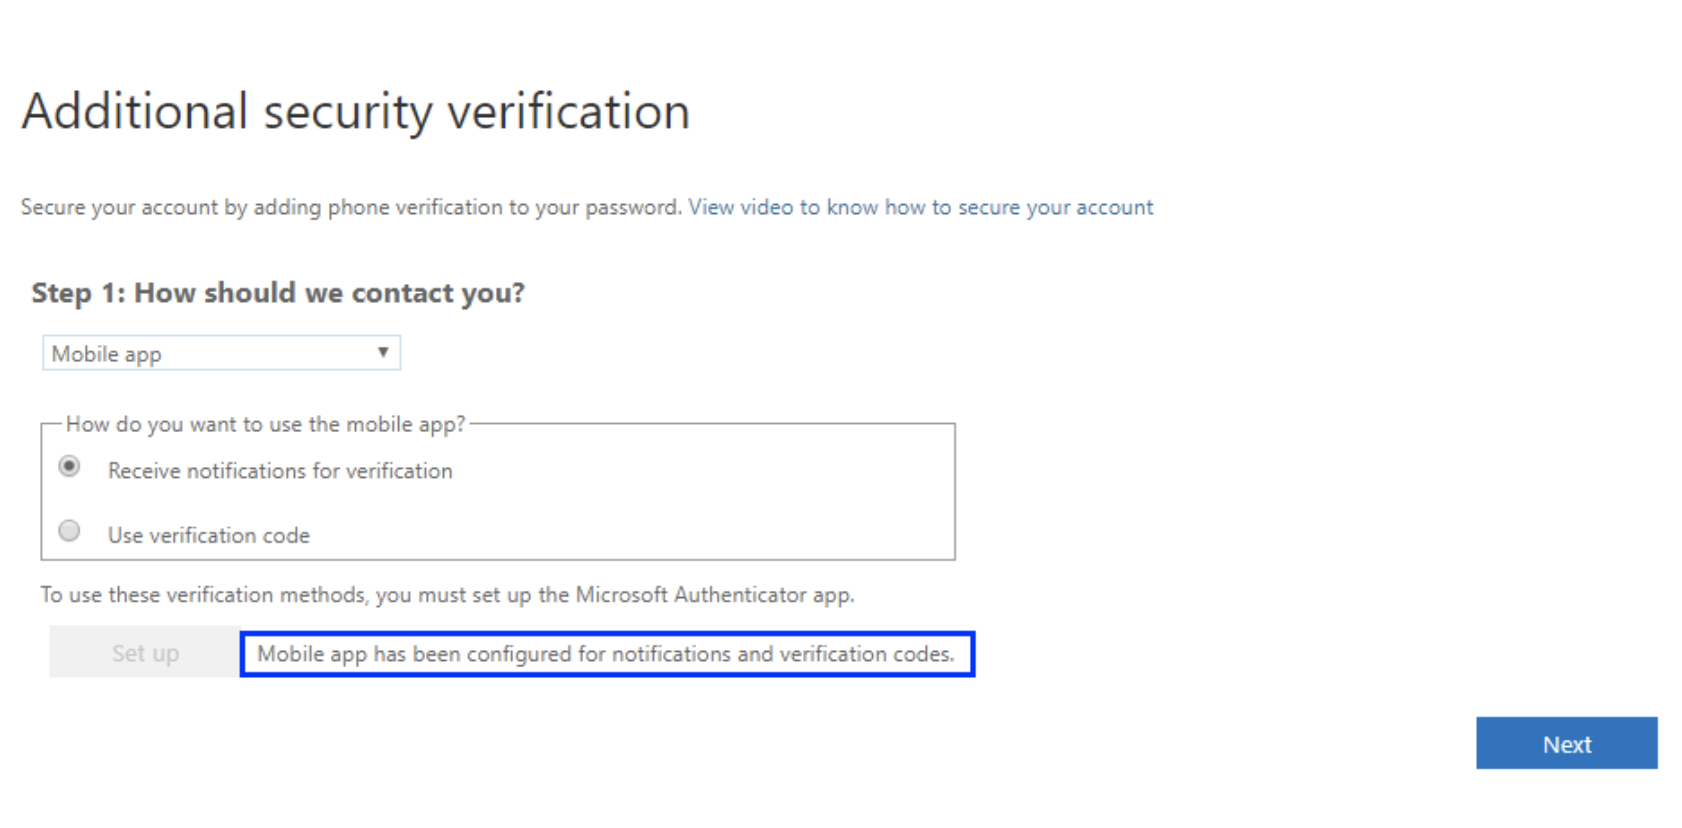
6. On your mobile device, select Approve.
7. You will now be required to enter your phone number in case you lose access to the mobile app.
8. Click Done.
Additional Security Measures
If you are using the authenticator app, there is an app lock feature which requires your phone’s passcode/biometrics/face ID to use the app. Please follow these steps to enable;
- Open ‘Microsoft Authenticator’.
- Click on Menu (top right corner).
- Click on Setting.
- Under ‘Security’, you will see ‘App Lock’. Toggle the slider to enable.
To see Microsoft help guides, click here.
What Happens Now?
After you have successfully completed your enrollment ,your AUS account will have MFA enabled for use on Tuesday, 12 October 2021. Whenever you sign into certain applications such as GMail (http://email.aus.edu) or VPN, you will have to:
- Provide your AUS username and password
- Provide a second factor to authenticate your login (this will depend on the option you selected eg. verification request sent to your mobile app or phone call)
- Once approved on your device from your second factor authentication, you will be logged in.
Please refer back to the introduction video to see how MFA will look when logging into such services!
If you are not prompted to provide a second factor authentication, you may not have enrolled correctly. Please revisit the MFA instruction video or revisit the What do I need to do? section.
If you are still having trouble enrolling, please contact [email protected].